Epoxy Grout: its 7 Placement Steps, Mixing, & Advantages
Epoxy grout is made of epoxy resins combined with a filler powder and this makes it almost completely resistant to stains and waterproof. For splashbacks, floors, and high-traffic areas, the epoxy grout durability makes it the ideal choice.
Making it ideal for applying in wet areas like showers, epoxy grout won’t crack, shrink, or discolor and epoxy grout does not need to be sealed due to its non-porous nature, unlike traditional cement grout. For repairing hairline cracks and cavities in concrete structures epoxy-grout mortar is commonly used and as a bonding agent, it can be adopted.

Epoxy grout can be used in the same ways as traditional grout products and is a far superior grout than traditional grout. If you are looking for the most durable and efficient way to do tilework then epoxy grout is strong, durable, and is highly resistant to stains, cracks, chemicals, climate changes, and harsh weather conditions.
For areas with high traffic the stain, crack and chemical-resistant properties make it suitable and for areas where it will be subjected to harsh weather conditions, excessive amounts of humidity or severe cold, the resistance to weather and climate changes make it ideal.
As compared to cement-based grout products, epoxy grout is a bit more expensive but you’ll quickly know how wise it is to choose epoxy grout over traditional grout when you look at a few more of the positive aspects of epoxy grout products.
Mixing of Epoxy Grout:
There are the following steps in the mixing of this grout as given below;
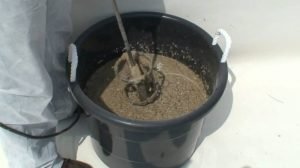
- Into a 20 liter bucket along with the resin, pour the hardener and by using a suitable heavy-duty mixer, mix slowly and until well mixed to a uniform amber color mixing spiral for no more than 30 seconds.
- When the mixture is running add the aggregate and to avoid air entrapment, mix only until aggregate is completely wetted out. To ensure all aggregate is thoroughly combined scrape down the sides of the mixing vessel and mixing should not take more than 3 minutes.
- Pour the grout directly from the mixing bucket after removing the mixer.

Always know that aggregate is added to the mixer after the premixed liquids have been poured in and the temperature of the grout, foundation, and equipment base is more important because they will affect the rate of grout flow.
Placement of Epoxy Grout:
There are the following steps in the placement of the epoxy grout as listed below;
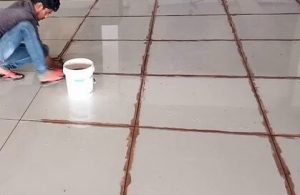
- Within15 minutes of being mixed, pour the grout into the shuttering, and in pouring any delay may affect the workability of the epoxy grout if left in the bucket.
- Pour the grout from one side through to the other and always across the shortest distance for flat-bottom plates and bases.
- By starting at one end of the form and filling the cavity completely while advancing toward the other end prevent air entrapment when grouting closed areas.
- These gouts are flowable but it can be aided with pushing tools like plywood strips or banding straps and until no air pockets remain under the frames push with long and slow strokes rather than short jabs.
- A headbox will greatly assist flow where grout cannot be adequately worked to fill the cavity and for leaks in the form check frequently because they will cause voids if not stooped.
- Remove uncured epoxy from the mixer and tools with soap and water after the pour is completed and cured material must be removed. By brushing the surface a smooth finish on the grout shoulder may be obtained and by smoothing the surface several times just prior to the hardening of the grout surface best results can be obtained.
- As the grout solidifies, sprinkle a small amount of MasterFlow 648 aggregate on the first pour’s surface if a multi-pour installation is necessary. Brush the loose aggregate from the first pour’s surface before placement of the second pour.
Curing of Epoxy Grout:
This grout develops nearly 100% of their ultimate strength in seven days and develops high compressive strengths in as little as 12 hours. For specific curing rates see individual product datasheets.

Curing rates can be accelerated in many cases through the addition of an accelerator designed for use with the particular grout and curing rates are retarded at lower temperatures.
Advantages of Epoxy Grout:
There are the following advantages of this grout such as;
- This grout can last for a lifetime because it is a very strong, exceedingly durable, and chemically-resistant material.
- It is stain-resistant and is non-porous and discourages the growth of mold.
- For areas like bathrooms and kitchens which are prone to damage by water, this grout is highly suitable.
- It is easy to maintain, ensures fuss-free cleaning, and is stain-resistant.
- With a damp cloth or wet sponge, dust and grime can be easily cleaned in this grout.
- In a wide range of colors it is available and to impart a neat and seamless look it will match the color of the tile.
Disadvantages:
There are also some disadvantages such as:
- Two or three materials need to be mixed in correct proportions before application so working with this grout is a little complicated.
- To avoid wastage, it is essential to prepare the mixture in batches, and to work with the grout it gives very limited time.
- More time-consuming and installation and material costs are high.
- It may turn yellow over a period of time if exposed to sunlight.

