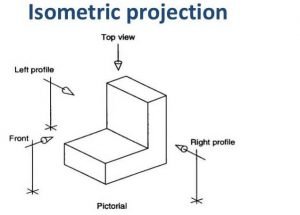
Isometric projection in technical and engineering drawings is a method of visually representing three-dimensional objects in two dimensions. Isometric projection is a method of graphic representation and the technique is intended to combine the illusion of depth.
The isometric projection is one class of orthographic projections and if the plane is oriented an isometric projection results so that it makes equal angles.

The three visible faces appear as equilateral parallelograms in isometric drawings of a cube and the horizontal edges are drawn at an angle of 30° from the normal horizontal axis while all of the parallel edges of the cube are projected as parallel lines.
The plane is placed in such a way that all three visible sides of the object make the same angle with one another and at an angle of 120°, all three sides meet at a point with one another.
Methods Of Drawing Isometric Projection or Drawing:
There are the following two methods as given below:
- Box-Method
- Off-Set Method
Box Method:
The box method is easy and intelligible and for the drawing, it takes much time.
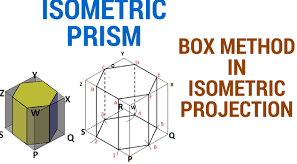
The maximum length, height, and breadth are noted in this method and by these dimensions, a box is constructed. According to isometric projection, these dimensions of the box are represented and with the horizontal line these make angles of 30, 30, and 90 degrees, and all parts of the object are shown after this.
For this purpose to the isometric axis, isometric lines are drawn parallel and after this these non-isometric lines, curves and circles are drawn and extra lines are erased lastly.

Off-Set Method:
For preparing an isometric view in the offset method the side, length, and breadth of the object to the isometric axis are drawn parallel and according to the dimensions, the other isometric and non-isometric lines are drawn.
Circles and curves are drawn and the drawing is completed by erasing extra lines lastly.

Isometric Scale:
The isometric lines make the angle of 30° with the horizontal line in isometric projection and their length is not equal to the actual length.
To form an isometric projection the isometric scale is prepared and the actual dimensions are transformed into isometric dimensions with the help of this scale.
Method of Drawing Isometric Scale:
There are the following methods used for the drawing of an isometric scale such as;
- Draw two lines at 45° and 30° after drawing a horizontal line.
- According to the actual scale put marks on the 45° line.
- To represent the isometric scale draw perpendicular offsets from the 45° line up to the 30° line.
So, this is the way from which the isometric scale is prepared.
Isometric Lines, Circles, & Curves:
To the axes, the lines which are drawn parallel in forming isometric projection are known as isometric lines and to the actual length, the represented length is not equal.
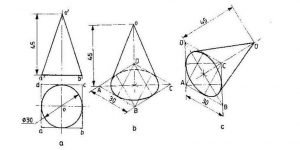
The isometric square is constructed for drawing the circles, then the four centres of an ellipse are shown and isometric circles are also not the actual circles but these circles are elliptic.
The points of intersection of the corner of the bigger angle of the isometric square and the sides confronting it and by drawings arc the circle is completed.
Difference between Isometric Drawing and Isometric Projection:
The isometric drawing and isometric projection drawing methods are the same but all the dimensions in isometric drawing are actual while the isometric scale is to be used in the isometric projection.
The dimensions are less than the actual ones as a result and it is to be multiplied by 82/100 to get the isometric dimension from the actual dimension.
Advantages Of Isometric Projection:
There are the following advantages of this projection such as;
- This projection doesn’t need multiple views.
- Illustrates the 3D nature of the object.
- To scale along principal axes measurements can be made.
- In terms of measurement, it provides accuracy.
- It is easy to layout and measure.
Disadvantages Of Isometric Projection:
There are the following disadvantages of this projection such as;
- It creates a distorted appearance by lack of foreshortening.
- It is more useful for rectangular than curved shapes.
- It distorts shape and depth.
- Instead of the real view, it only provides a 2D view.
Examples:
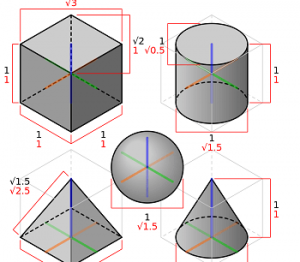
Notice that each image shows three axes to represent each dimension of the object in these examples.
The blue colour line is the actual axis and orange and green are two horizontal axes shown in the figure.

